Saturday, December 24, 2016

Goals and Thank yous

It's the most wonderful time of the year!
A time to be thankful and start writing 2017 art goals.

Snuggled - small 4x6" quick painting. Loved the snow!

I've said it before and I will say it again, I am thankful for my art friends. My friends are kindred spirits who are sounding boards, informers, sharers, listeners and mentors--thank you!
When I am in the studio with my friends, I forget my troubles.

I was chatting recently with my art friends and was surprised to learn that I am in the minority when it comes to making art goals. Yes, I make yearly art goals and I encourage you to do the same. Goals help me focus and they are something that I think about throughout the year.  I believe in art goals, I believe in working toward goals and I believe in the action of writing goals down.

Last year I completed the following: update blog twice a month, create an art inventory, complete more landscape paintings, create an art website. Incomplete goals include selling a larger work and Giclee prints of my Santa (I did look into Giclee prints, they were much more expensive than anticipated)...

Also, I had my first solo show and was accepted to have a second solo show in February 2017. One reason for the shows was my preparation--because I had goals and was out painting more often, I was confident that I had enough completed work for a solo exhibit.

I have started thinking about my 2017 goals, and plan on discussing them with my husband on an upcoming road trip--the best time to brainstorm and jot down ideas. I already know that goals will include Art Quick Studies (painting two small one hour paintings each week)--this is something I started recently that I enjoy.


Friday, December 2, 2016

Quick Painting: Small Work Evolution!

Putting IDEAS into ACTION
A quick one hour study, 5x7

I constantly Google art and research art blogs; always looking for inspiration. I recently read an article endorsing quick paintings, which must be small and must be completed in a short amount of time. I thought this a good idea, a good way to improve my painting skills!

The next art group studio session, I mentioned this Quick Painting idea to my art colleague and said, " Hey, maybe we should do  this each week and hold each other accountable." And, to my shock and delight, it evolved from there!

Purpose of this group: Improve Painting Skills Through Quick Studies

Goal: Create two art quick studies each week
  • One hour or less for each study
  • Small works encouraged (3x3, 4x6, 5x7 etc)--whatever you can get done in an hour
Why Participate: improve your painting skills, make faster decisions, paint more quickly, paint more, use more intuition, less overthinking, less overworkingWhat: What you paint is up to you- Still Life, Portrait, Landscape, Abstract -- the point is to paint and paint quickly, using a 60 Minute timer! 

 Sounds easy, right? The main flaw was how to share the works with each other--my works were "wet paint" and not easy to transport.

One great thing about going to studio art sessions is the discussions that are generated. We basically brainstormed virtual ways we could share the art with each other. We have blogs, Facebook, Instagram and all that, but how to create a private place for these artists to post weekly Quick Paintings? Eventually we settled on creating a Private Facebook Group where we can create Picture "Albums" for our weekly artwork.

And, as we were discussing further this idea, several others in the art group stated they would like to join us in the Quick Paint Weekly Challenges! I was surprised and thrilled!

As of now, the Quick Painting group is 5 people, but one other artist has expressed interest and will join us in this endeavor. Wohoo!


Saturday, November 26, 2016

Support Small Business Saturday - Original Art Sale!

Christmas is coming, buy some Original Art!

Since I now run a small business, I must support small business -  I plan on going out to some small retail businesses this afternoon!

I am offering two works for discounted sale for Small Business Saturday, two of my favorites! They can be purchased through my website (which is supported via Paypal). Each work is offered for the discount price of $100 (unframed) plus shipping and handling.

My website link:
http://greenhandleart.com/collections/91416


Peter Rabbit's Garden 

Peter Rabbit's Garden, 8x10, original Oil

Heritage Nature Center


Heritage Nature Center, 8x10, original Oil
Thank you and Happy Holidays,

Monday, November 7, 2016

The Office

It Doesn't Get Any Better Than This...

MY OFFICE
I have had that job, the one where you sit in the dreary cube in the beige building breathing in the stale air, so frustrating especially when it is nice outside...

My husband  was travelling and sent me a picture of his office --a computer, cords and an ugly beige room. The office was a windowless mini box of beige on beige, it was sad and depressing. Of course he sent his #Jealous in response to "My Office" pic and text. I am thankful everyday that I get to make art, especially thankful for the sunshine on this November day.

Lately I have been closely watching the weather, looking for sunshine! I knew the temps were going to be abnormally high, but I had to wait until the last minute to ensure there was no rain in the forecast. Since I emailed late, I did not have any art friends who could meet me. I decided to go anyway, I had to be outside on this sunny day!

The day ended up being breezy (windier than I thought it would be). And, while the sun was shining, I was in the shade --I had to get up a few times to get sun on my feet which were cold. Otherwise this spot was perfect! I was tired and had to sit, so I set the Guerilla Box on the Picnic table with my painting supplies (my desk), it worked out very well!

I loved the colors - the red and yellow leafy trees against the blue water. I also loved the shapes - there were many horizontal diagonals! The foreground was the reeds followed by the water followed by the trees/shoreline and finally sky. I loved the diagonal patterns that these nature items made on my canvas. And, I like where this colorful fall painting is going. Unfortunately, I did not finish the painting, after a few hours I had to get back home. Yes, I intend to finish this painting. I need to work on my red tree and the foreground reeds. Sometimes you just cannot finish same day and that is ok, it was still a wonderful experience to get out of the house and to "get to work" --working in the most beautiful office!

Enjoy the sunshine and get to work,


Friday, October 21, 2016

Plein Air Persistence


I love painting on sunny fall days, and since the forecast was for the "last sunny" warm day of the year, I had to get outside! Darn you weather persons, it was warm but it was not sunny and the "breeze" was a wild 30 MPH wind! 

Color of The Wind, 9x12
5 of us bravely showed up at the park ---Wind Paint Challenge Accepted

The wind blew and blew and gusted against us as we set up on the peninsula, exposed to the wind! There is no greater test of your plein air equipment than the wind. One brave plein air artist braced the wind while holding her canvas with her left hand and painting with her right -her hat brim flipping furiously back. Does anyone need us to test plein air equipment? My borrowed 9x12 Guerrilla easel held up, no wobble. My friend's SolTek held up, but she did hold her canvas panel. Challenging and yet, how fun and wonderful was it to be in the park painting the fall colors?

I was very pleased with my Color of The Wind painting, and did not work on it much once I had it home. I loved the orange and yellow island trees against the grey skies. I also loved the shape of the dark island branch on the left as it reached out over the water. The water was much lighter than the usual blue since there was no bright blue sky. Also, I really wanted to include the bright green lily pads in the foreground- their color and patterning was fascinating. It was a good day to paint! I believe that each painter went home with a successful plein air painting and I am very proud of all who showed up despite the wind and grey skies!

It is official, due to our persistence, we ARE plein air painters!


Thursday, October 13, 2016

A Little Moment

Finding the Unexpected

There is a lovely working farm near my house. I went there to find a glimpse of fall color, but it seems I was a bit too early. I did not find much color at all, the only color was in the children's garden and there I discovered this little Peter Rabbit Garden. A bunny statue surrounded by colorful bright flowers seemed so vibrant and sweet.

Peter Rabbit's Garden, 8x10
The Secret Garden and Peter Rabbit stories were in my head the entire time I painted in the sunshine. It was breezy and cool and I was fine until the shade crept in then it was a little cold, brr!

The difficulty with this one was there was no horizon, no sky. I had to place the bunny sculpture on the canvas and figure out the composition to get a sense of flowers surrounding him. I really loved the way the flowers and garden enclosed the bunny. The reds were bright, the greens were lush, the purples were few but delightful. My favorites were the large white cabbage-like plants that Peter Cottontail would have gone after in the garden!


I am happy with this sweet little painting and truly enjoyed painting this little gem, I am also pleased that the many brushstrokes help create the sense of flowers circling the rabbit.


Wednesday, September 28, 2016

Just Say Yes!

Get Thee Outside

I have not felt this busy, this overscheduled in a long time! All of our weekends are full - each and every weekend we have something which we must attend. And, the deadlines have all stacked up as well, everything is due (seemingly) tomorrow! I seriously cannot remember the last time that I had so much going on.

Spicer House, painting light and shadows
Last Sunday, I should have stayed home to clean the house - it needs it and we had a home inspection on Monday, for which it needed to be sparkle. House cleaning should be a priority right? Well, spiritually and artistically I decided to take a few hours for myself! Yep, some "Me Time"; I said Yes to myself.

So, when an art friend wanted to meet to plein air paint on Sunday, despite all of my busy goings ons, I said yes. I went to the park and spent 4 hours in Plein Air Bliss, it was worth it! I was refreshed!

Yes, after painting, I did go home and clean - the bathroom, the kitchen, the living room-- to satisfaction. No, I did not get to cleaning the "scary room"--the storage room that has gotten out of hand (yes it needs a cleaning BAD). Someday I will get to it, I don't like it, but I can live with the scary room a little longer!

My advice, say "Yes" to you every once in awhile.


Thursday, September 22, 2016

SHOW PREP - 2 Weeks Until The SHOW

Deadlines & a huge list of things to do - Oh My!

It is an honor to be asked to be a Solo Artist for a venue - if you get the opportunity you should go for it! Next month I will have a Solo Show in a delicious little bistro. I was thrilled to be asked; however, getting a show together means much behind the scenes work! I had quite a bit of work to do to be show ready!

My To Do List:
Visit Venue
Create a Website
Order New Business Cards (with new website URL)
Business Card Holder
PR- Emails to Art Friends and Art Associations & Social Media
A Big Box O'Frames! Too Exciting!
Art for Venue (What works should be in show?)
Inventory  List
Price and Title Cards
Frames for all artworks/ framed art!


Having found the venue to be a little dark (not many windows or natural light), I decided to show lighter works in brighter frames. While I paint many portraits, I felt this venue might be nice for landscapes. This meant that I had to challenge myself to create more landscapes. I will have a few portraits in the show, but it will mostly be rich colorful landscapes.

As of now, I have finished much of my to do list - website, biz cards, artwork, and card holder. Whew! I have also ordered all of my frames.

Now  I need to focus on framing my art and create my inventory list and title cards! Oh wait that seems like a lot! Off to frame I go...


Sunday, September 11, 2016

Leave The Stress, Take the Paints

The Rare 4 Day Weekend Getaway

At the very last minute, we decided to leave town for the 4 day weekend (time off is so rare). The weather was nice & we live near beautiful drivable scenery - lucky us! I deliberated taking my paints on this short jaunt, but I am glad that I did.
Old Mission Point, 9x12


Our first day, we walked through town, had breakfast and then decided to take a drive up to the old lighthouse. We didn't exactly know what to expect, I had hoped to paint the lighthouse but it was surrounded by trees! I took some pictures anyway, but there was no great spot to set up and paint. The sandy shore in front of the lighthouse was low and full of mid-day sun -- not the best circumstances. However, off to the left of the sunny shoreline, was a nice shady spot, close to the water with a lovely peninsula vista against a dreamy blue sky. We followed a path through the woods to the car, gathered our beach chairs and my painting gear. The weather was 70's, sunny and breezy with low humidity - comfortable!

I set up my paints while my husband sat with me in the shade and read. It was quiet and we were able to relax on the shore, not too far from the lighthouse, undisturbed. We had two delicious hours of calm meditative reading and painting. I was very thankful that I had brought my painting gear on the trip.

Betsie Bay, 9x12
The next day was busy! We had breakfast, read the paper on the front porch, walked to the Farmers Market, shopped downtown a bit, visited an art studio and post-lunch decided to find a place to paint! The weather was still lovely 70s breezy but the beach was too sunny, no shade at all. We ended up at the park under shady trees, the trees were close to the street with a view of the bay. We parked very close to where we would set up-- a plus. Again my husband read while I set up and painted for a few hours in the late afternoon.

My "Vaca Takeaway" was that somehow even with a busy schedule, I found time to paint several hours each day. Preparation was key - I had the supplies in the car and it was relatively easy to pick a place and set up! Of course the weather cooperated, but after this adventure, I encourage you to take your paints with you!


Thursday, August 25, 2016

Hard Work - Behind the Scenes

Art Show Prep

White Mats!
Recently I completed some sweet little paintings, I call them my Bathing Beauty Series. They would look great in a Master Bedroom or bathroom. They are little 8x6" Acrylic Inks/Watercolor blocks on watercolor paper.


Art affixed to mat with mount strips.
Since I have a show at a gallery in September, I wanted to put these little Bathing Beauties in an art bin for sale. I had no idea how much work it would be to get them ready for the show...


Plastic Seal Bag -to put art in.
First I had to purchase all the materials to put them together:

  • 8x10 mats
  • 8x10 foam board
  • Plastic Seal to hold artwork (Krystal seal)
  • Archival Mounting Strips - to tape artwork to mat
  • Rectangle labels, Price stickers
  • Business Cards


What a Process:
I had to sign my work.
Then I had to put the mat on the work and then use Mounting Strips to tape the work to the mat.
Then I put the foam board and the mounted work into the plastic seal.
Next I had to put the Business Card in the back and figure out labels.
I found some labels at Target and on each label I put the Art Name and Size. And, I put a Price sticker.

Now repeat the above process for each work!

Whew! But I do love how each work looks now - so professional!
The final polished product - wowza!
(teal box added to blog image to cover nude figure)

Please stop by Lawrence Street Gallery this September to see the Bathing Beauty Series in person!


Saturday, August 20, 2016

"Pause" To Be Thankful

Gratitude for Good Friends

My current plein air set up - cheap field easel and all...
And the quest for better equipment

In my opinion, the most valuable asset for artists is other artists. Making art is very often an independent and solitary process which can be tough and isolating. Forming art friendships is one of the most important things that an artist can do for herself. Art friends are willing to talk with you about art and about the complexities of making art. Art friends listen when you ask questions and talk about frustrations; willing to offer critiques and advice. Making art without an art community would be most difficult to do.

Initially, for a few group plein air sessions, I bought a cheap french easel - not planning to paint much outdoors. However, I now want to do more plein air which means that I want a better easel. My $50 french easel works fine and has stood up to wind rain and cold. However, it is a HUGE pain to set up. And I have been caught in the rain trying to unscrew it and take it all down--me and my equipment getting drenched.

Recently I have been researching better plein air easels, starting by asking art friends what they use and endorse. The Artists who do the most plein air painting all highly endorse the Soltek -which is pricey but easy to set up. Good plein air easels are costly-much much more expensive than my little cheapo easel. After I save up, the next big question is how do I choose what is best for me? I want equipment that I like in the field and that will endure for years. Having painted outside, in breeze and wind, a sturdy set up is a must. And lighter weight (since I don't Crossfit) would be a big plus. In doing my online research, I created a plein air easel comparison spreadsheet. I narrowed down my options and sent my spreadsheet to my art friend for her review.
Borrowed easel, easy setup

The next day we had an art session together and she brought one of her old plein air easels. Not only did she show me the Guerrilla Painter easel, she also showed me how to set it up and take it down. After her very positive endorsement she also said that I could try it for a month. Wow [insert gratitude here]! What a generous and amazing gesture and what an opportunity for me! Thank you Janet!

I took the Guerrilla out today for a plein air session, and loved the easy setup. The palette space is small, but I had no problem with that. And, I loved that I could put my wet canvas into the lid for portability. This testing an easel is pretty fun! The weather looks cooler next week, my Guerilla painter testing session will continue-stay tuned!

Janet's gesture reinforced my belief in my art friends and led me to pause to contemplate my gratitude for them. Everyday I am thankful for all of my art friends, beautiful wonderful people! Thank you, I appreciate you all!


....


Tuesday, August 9, 2016

Setting Up An Art Website

LESSONS LEARNED: What to do BEFORE you create your website

#1 Set Aside Several Hours to work on your site.
Mine has taken me (just to get basic bones) about 12 hours (4hrs/day over 3 days).


Research
First and foremost who will host your website? What is important to you? How technical are you? What do you hear about Customer Support?

I have been thinking of creating a website for some time (9 months or so). And, I have looked for sites that I like (art websites) and asked my art friends what sites they use. Art Friend feedback counted strongly for the host that I chose for my website - FASO (Fine Art Studio Online).

Domain Name
What will you call your website? Is that Domain Name available? You can Google for Domain Name to verify whether or not it is available.

Art Inventory
What pictures of your work will you feature? Title, Size, Price, Availability all should be documented in an Art Inventory (I use an Excel Spreadsheet). You will have to type in this information, and it is easier if you can refer to your Inventory list.

Quality Photos/Photo Inventory 
Each artwork that you want to feature on your website must be presented in its best light, and you have to have a quality image of said art. Uploading photos is easy, but you again need to have an image inventory from which to choose!

About Me
You should have an Art Resume, if not create one. I imported my art resume into my About Me section. Also here it is suggested that you have a photo of you, another image that you need.

Events
This is an important section, where you should list upcoming art shows. I used a show postcard to add my upcoming event dates and times and I included a link to that gallery. All of this information you should have next to you when you create your site.

Blog
One question to ask is if you can link your existing blog to your website. Or, conversely if you are not or will not blog -- can you hide that option. I cannot tell you how many times I have gone to an artist website, clicked on their blog link only to see a post from 2 years ago-UGH remove that link!

Link To Social Media
You should have an existing Facebook or Instagram or Pinterest to link to -- set this up beforehand. These days an Art Business Page on Facebook seems to be the norm.

CONCLUSION:
As you can see, it is not as easy as "Yeah, just sign up for a website." There is much work that you must put into it.

Here is my website link - which I will warn you is still a work in progress, it still needs more art images. I had to Go Live before I was ready in order to ensure that I got the Domain Name that I wanted. It takes a long time to take a good photo, upload an art photo,  and write a description -- creating an art inventory alone is work! But, if you have all of the above done, it will help you get your website live faster!

Green Handle Art Website
greenhandleart.com


Tuesday, August 2, 2016

Roses in Bloom

Light, Romance, & Roses Abound
English Rose


Lately, I have been focusing on making lighter brighter paintings. Some of this is intentional as I have a show this fall that is in a darker venue which led me to realize that I want to feature brighter works.

While I may not be in love with the English Rose painting, I am in love with the rose in her hair. I had fun painting this portrait. I was focused more on paint strokes and composition than I was features. The model is more petite and soft in real life. I loved how the light hit her braid and how the light hit the flower in her hair - beautiful. Also, I used a huge brush to paint in the choppy background--a new "try" for me. I wanted a loose thick background brushstroke--so I bought a new big brush. I tried to mix several purples to be in the background and I also tried to lay them in and leave them...And seemingly as always, this one looks better in person. Actually this painting style reminds me of two great artists--John Larriva & Malcom Liepke --both are terrific artists whom I admire!
Lost in Austen

My first version of Lost In Austen, painted quickly en plein air was not as good as I wanted it to be. Using photo references, I created this painting which I like much better.  The hat was difficult to paint as it had a veil up behind it, so I had to work to create a transparent look. The features represent the model fairly accurately, although I did put a little more emphasis on her mouth -which I left intentionally larger than reality. Also, hard to tell in this picture, but there is much light on the left side of her face and hair. I went back in and added a really white light yellow to the left side. The strokes in the background were made with a little brush --I like the Van Gogh-ish aspects of this background.
Be Still My Soul

This next scene, Be Still My Soul, is also a bit romantic, although I am not sure about the look on her face.? This is a favorite model of mine and she usually has attitude--which I still feel here even though I wanted a softer look! I perhaps made her gaze too high... Hmmm...And I may change the title, she looks so church lady...

Otherwise, I like the light bright beauty of Be Still My Soul. The hat was awash with light and seemed the brightest aspect of the portrait. I also loved the darks and lights in her hair. And, the rose pattern on her robe was rather delicious... This is the painting that inspired me to get a big brush for background as I had wanted tons of paint and a darker teal; yet when I used my big brushes at home they blended and left lines that I didn't like. So when I went back in to remove the lines, I mushed the background and it became a little light...

Enchanted Summer
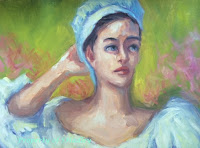
And the latest in the outdoor rose romance series is...Enchanted Summer. This painting does not capture the model's features - but I still like it. Once again, I focused on brushwork and light. I wanted the white dress to be the lightest brightest. I went back in and added cad yellow light to white to the blouse to get a nice white glow (which matches the bright green background). And, I wanted to play a bit with the background--in reality this was painted indoors but I have a show coming up and needed an outdoor background. I added the pink color over the green background, which really helps with the visual interest.


Saturday, July 23, 2016

Cool Days---In Summer

80/Partly Cloudy 

My family and I have a rule that we eat outside and walk outside whenever we can - ala sunny mild days. The last two Saturdays this July have been cool (for summer) and overcast - which means it has been cool enough to be outdoors.

Turtle Bay, Grey Day
We love spending time outside, and love that there are many beautiful parks in our area. Since we have a parks pass, we  take advantage. We have found a favorite large park and even on a busy Saturday at lunchtime we were able to find a quiet picnic spot. After our picnic, I painted while my husband read, a meditative lovely day.

The first Saturday was breezy and cool, with many grey clouds in the sky. We felt lucky to find a nice quiet place by the lake. I set up my easel on the picnic table and painted away. While painting I observed many birds fluttering and chattering away.

For composition, I loved the jut of these trees as they sway out toward the lake. The tree island is my focal point. There were many bright green algae/lilypads on the water in this little cove. And, the trees in the background are nice and dark, far away. I loved setting in the pattern of sky, background trees, lake, island and trees, then lilypad water. The composition pattern was a zig-zag which is not obvious at first glance, but is how I laid it all in. And, lily pads are new for me, I was a bit fascinated with their patterns and shapes, fun!

Hickory Ridge, Grey Day
The Second Saturday was breezy and cool as well, the sky was several shades lighter gray than the previous week. I was also further away from my subject. There was quite a distance across the lake to the first set of green trees.  And once again I fell for the patterning of the lily pads on the water (foreground). In this location the lilypads were a light orange-ish color. I also loved the cove patterns as behind the first set of trees is a break in the water and behind that another break. The furthest set of trees was dark and blue. The lake was bright and light as the sky was very light grey-blue.  Personally I feel that this particular painting is better in person --the painterly brush strokes are more apparent and more appealing in real life! Another reason I am happy with this painting is that I painted it all in one session on location!


Thursday, July 7, 2016

Capturing Emotion

Close Up! Eyes & mouth have it!
Time to Show Some Portraits 

As I look back through my posts these last few months they seem landscape heavy which is odd because I paint portraits twice a week!


Full view, not as successful.
Here are a few recent portraits which I have completed and which for the most part I believe successful. What I am finding lately is that I like some features of portraits but not entire portraits which is a bit frustrating. Each portrait is done in about 2.5 hours.

Full View
I received many compliments on this portrait on the left, particularly about the emotion in the eyes. I do think the eyes and mouth are successful; however, I feel there is too much same color on the face somehow, it looks a bit dull to me. Also, I am not in love with the jawline...hmmmm

The next portrait I was fairly happy with- this is a new model for us, I loved her white hair! Usually with drawing and painting new models, it takes time to figure out features. This time, I was on a limited schedule and worked quickly. I chose purple shadows for the white hair and while that might not make sense, I find it intriguing and think that it works.  And, I love the serious no nonsense Italian Grandmother look on her face! Don't you think that her thoughts were something along the lines of, "I disapprove, now get to work!"? Actually, I think most aspects of this painting from the hair to the robe are rendered successfully. Often I render lyrical sweet paintings; this particular painting is nice because of the serious line in her mouth.


That earring!
Love the Hair!
My issue here is with that darn earring. It was a sparkly yellow green chandelier which I found very appealing, but I am unhappy with the way it turned out. For the earring there was a light bright side and a dark side and lots of shine, but here, I think perhaps it is too defined. I wish it had been done with less strokes -more quickly! Ah - improvements/lesson learned for next time.

I find that the close ups on this page are more attractive to me than the whole portraits, that is something I will really have to think about...

Tuesday, June 28, 2016

What A Wonderful World


I see trees of green,
red roses too.
I see them bloom,
for me and you.
And I think to myself,
what a wonderful world.--Wonderful World song lyrics

With 74 as today's high, it is most definitely a plein air paint day! 

Pops Of Color! Fun!
The plants and flowers are blooming happily this summer, it felt like a gorgeous spring day outside. I saw color all around in flowers of pink and orange and lots of light bright flourishing greens. The sun was shining and there were very few clouds in the brilliant blue sky, again it sure seemed like Spring and I was happy with that!

What I loved most about this view was the bright colors of the foreground - pink roses and orange flowers. I left the pink and orange colors pure when I applied them as they are the center of interest and I did not want muddy colors. I liked the contrast of the blue green brush against the orange flowers. I saw quite a bit of pink in the sunlight today. The path to the bridge was bright and very light (pinkish) and there even seemed to be a bit of pink along the water's edge in the background. Another feature of this painting includes the impressionistic brushstrokes - I enjoyed making and finding little patterns along the way. Probably, I could use more dull and more green, but this was painted outside alla prima - I can make a note and have a greener painting next time.

I also discovered that I love my new sky blue color - which is called Manganese Blue Hue. Previously I have mixed or applied Ultramarine, Cobalt or Cerulean Blue to get a good sky blue. Manganese and a touch of Titanium White really color matches to the color of the summer sky.

Strong on the brights and maybe too pure in color--still a wonderful day, a wonderful little painting.


Wednesday, June 22, 2016

Working Quickly And Staying ArtBusy

A One Day Portrait Workshop
One Eye is rather nice


Last week I had a one day Landscape Workshop, now this week I had a one day Portrait Workshop. Intense! We had a live model for the Portrait class.

The Instructor started with a value demo of the model, using only black and white (his work not pictured here). His value demo was very quick and he did not go into detail, more of a light and shadow pattern - I would call it "massed in."

With my first value study, I struggled. I was not happy with the Canvas Paper -- the paint would not move around and the paper felt dry and it was hard to apply my paint. I think we had 30 minutes to complete this value study. I focused perhaps too hard on getting features placed on a new-to-me model. I also did not have a good view, too little of the right side of the face-that was a struggle.
Better Value Study

The next pose for a value study was much kinder to me, an almost full face frontal. I loved the shadow side of the face, there was a strong shadow from the nose onto the cheek.  I like the nose and mouth here too. A much more successful value study.

For the last pose of the day, we brought out the color! Finally! We used a Zorn limited palette which included Titanium White, Ivory Black, Yellow Ochre and Scarlet Lake. I was curious to try Scarlet Lake which was an Orange Red -somehow seemingly a bit brighter than Cadmium Red Medium.
A few nice areas, still imperfect.

Unfortunately I had the bad corner again and I struggled with the short shadow side of the face--I do not know why this tests me so!Ugh! I was happy with the left eye that I painted and with the colors I was able to achieve with the limited palette. I was able to achieve the glow of her red hair, the light skin tone and the orangey mouth color. Again, the time constraints on these paintings were incredibly limiting. This painting is not done. I do not have enough paint down, I do not like the top of head shape, that shadow side really bugs me. I may work on this a little bit to correct a few things, maybe. While I dislike the overall painting, look at the eye closeup, I think it reads well and is accurate in shape, form and color. So one teeny segment looks nice!

This close up is lovely, if only this eye section was the painting! 
Overall, and once again, a one day intense art workshop is good to kick start creativity and painting! I needed to go back to the basics of value studies and limited palette in order to move forward and I need to figure out that three quarter face view. If you are like me, a workshop will never lead to your best work but it is motivating and there is always more to learn!


Wednesday, June 15, 2016

Day By Day

Cloud Close Up!
A One Day Studio Landscape Workshop

Yesterday I went to a one day landscape painting workshop and even with the compressed schedule, I felt this was a valuable exercise for me! Every once in awhile we artists need these marathon paint challenges.

What does a one day workshop look like? Our instructor quickly showed us his landscape and plein air items - (value viewer, brushes, books, gesso boards etc.) and then did a quick value demo. Next we the students used our reference photos to create value studies on canva paper. Our value studies were created using only black and white paint. I was amazed at how well each of our value studies came out. We created the value studies in a very short time period, in about an hour.
B&W Value Study 
Limited Palette Painting
Next we posted our value studies next to our reference photos to create color studies - using limited palette. The limited palette I used was White, Cad Yellow Light, Alizarin Crimson, Ultramarine Blue and Black. I felt very confident in my color mixing skills - which really helped me adapt to the limited palette.

I was very pleased with my trees, a quick timeline helped me to create them and leave them alone (no overworking). Also, I thought the front of my barn house, that nice orangy color was perfect. Overall, I like the composition and feel of this painting.

My challenge was clouds which I have not painted before. For clouds, I put in the darks in a nice purple/blue ish first. I understand that clouds have the light top, mid-color  and then dark under --but it was still complex and a bit of a struggle. The time constraint of 1.5 hours was also an added challenge. I was very close to done when time was up! The last item of the day was a side by side review where we each showed our value study and color study (no one was completely finished). I was very impressed with how the compositions and values matched between the black and white and color studies for each artist! Amazing and obviously we were all good students! :)

At home I completed my painting by adding the orange foreground and the white around the barn windows. I also added a tiny bit of orangypurple to the dark area of the cloud which I think helps the overall painting.

If you get the paintportunity, I recommend a one day workshop challenge! Go for it!

Friday, June 10, 2016

Sweet & Sunny in High Key

En Plein Air

I've been wanting to find a plein air place that had not only trees but also a building or two. I recently found a park that fits the bill. I love the look of this historic house from the early 1900s. The sides and roof were dappled with sunlight-- since the painting is dominated with light this is considered a high key painting. The top of the roof line was a row of bright orange tiles and copper eave pipes had turned to an almost teal light blue-ish. The shadows were a purple-ish and I loved the shadows cast on the house by the trees. The house was surrounded by trees and flowers, a lovely and inviting summer composition.


With the light yellow-ish house color, the light flowers and greenery, and the expressive brushwork I feel that the house has a fresh and sweet sensibility - delicious!

My house is not straight lines because perfect lines were not my concern on this day. This day I am looking for value and pattern, the light and the way the light hits the form. The emphasis here is on the experience and the vibrancy of sunlight, the capturing of the moment. And, when working quickly painting outside, I wanted to cover the canvas and capture a lush imperfect fun little moment.


Tuesday, May 24, 2016

Art Meditation - En Plein Air

All set up and ready to go.


Sitting in the Shade Listening to Birds Sing

The Full Setup! 


Seventies and Sunny sounds like an opportunity to plein air paint! I emailed my art friends and invited them to plein air paint with me at a local farm. No one could join me, but  being an artist often equates to solitude and painting. What a beautiful day! 

Throughout the painting process, I would stop and enjoy the view. The cool breeze and sunshine felt great. I heard the birds singing and even watched a few geese families go by with their little fluffy goslings! Just the experience of taking time to paint outside made me feel calm and happy - an art meditation.

Adding darks, a good start.
Full sun would have been too much, so I enjoyed the view from the shade. Here is my setup -- I painted a small 8x10 canvas panel and used a fairly limited palette. 

Getting it all on the canvas -midway.
I started with my darks, getting everything placed on the panel, I love this part of the process. I was painting a pond that had water and lots of green. The small delight is found in the purple iris which I painted in toward the end. The rocks edge the small pond that feeds into the large pond (which is what you see behind the fence). The fence was wooden and deliciously crooked and imperfect.

Soon I was mixing colors and working on composition and light. The hardest part was finding and painting the pond blue--the sky reflection was so very light on this warm day. There was quite a bit of sun so this is a high key (light) painting.

The finished painting, fun bright colors!


Monday, April 18, 2016

Sunny Days! "Won't You Tell Me How to Get to..." Plein Air Street

Embrace The Sunshine

My painting setup - sunny & wonderful!
Living up north means cold winters and snow and lots of dreary grey days - I really start missing my sunshine. Last week the weather finally turned around and I found myself emailing friends asking if they wanted to plein air paint in the 60s Sunshine. One friend and I were able to meet up, and it was glorious & inspiring!

Red Reflection 8x10 Greenfield Village
My friend had passes to the historical Greenfield Village and I could not pass up the opportunity to see what it was all about. We walked around for two hours, she was a fabulous tour-guide as we explored the working farm, the animal areas, the industrial areas (my fave) and all of the historical buildings (so many!). Of course, she also knew that we had to stop for a lemonade at the Tavern, what a fun experience.

After seeing all of the acreage, we had to decide on a place to paint. Did I want to paint the Cotswold cottage, the train station, the carousel, the Red farmhouse, the Robert Frost house, the schoolhouse, the church, the tavern --well yes! But I had to chose one, there was almost too much to chose from, one could go there every day of the week for the summer and still not run out of material to paint! Of course, perfect sunny weather helped tremendously.


Early on I decided that I liked the Industrial Area-- there were many facades and buildings located around a pond and that appealed to me. I think I ended up painting a sawmill -- I will have to look at the map (acres and acres of goodness here). I chose this barn-like subject because I loved the color reflection in the pond - a bright lovely pink reflection. I loved the shape of the red building and the purple-ish shadow patterns that the bright sun created. I chose to not have much sky and to have the building fill up most of the canvas. I loved the vertical streetlight in front of the building and the pattern of the log fence around the pond. The entire experience was wonderful and I am happy with my light, form and color painting.

I started setting up to paint at about 1 pm and had to leave by 330 pm. Unfortunately, this painting is not finished, it is about 75% done. I wanted to go back and add the sunlit highlights to the building and to lighten the sky and work a bit on the roof. Overall, I am happy with this little painting, maybe because of the day and surroundings when the painting was created!

Supposed to be nice weather again this week, I will email friends and go out and plein air paint tomorrow!


Tuesday, April 5, 2016

Get Busy

Improving As an Artist

A maybe-potential Urban Landscape reference pic...

I want to become a better artist and I think this means that I have to get busy (busier). I recently heard an established artist say "You can only compete with yourself, making your next painting better than your last." I agree with that statement although I feel there is much work ahead for me. So what will I do about that?

I have signed up for an Urban Landscape painting class. This takes me out of my comfort zone as I have focused mainly on portraiture these last few years. I also want to work with an instructor as I have many landscape questions. I do not have much material (reference photographs) for this class, but I really want to challenge myself creatively and learn something that is not portrait related/outside my comfort zone.

I have also signed up for a one day portrait workshop. I do not know the instructor but I just want to see if there is some new information or inspiration that I can glean about portraiture. Particularly important to me as I continue to paint from life twice a week.

Three hours a week on Urban Landscape plus the 6 hours a week in life portrait (no instruction) seems a good fit. It is important to emphasize that my painting time is not limited to the studio and class times. I have to work from home to improve as an artist. Too often I hear (in class and at the studio) artists complaining about weaknesses and unfinished works - more often than not these are the people who do not work at home. "Work" is a key word and improvement will never come if you do not work and challenge yourself at home, it is a must!

So, I work at home, take classes, work at studio AND belong to a great community art group. If there is an art group in your community I highly encourage you to join - I love seeing what other artists are working on and the newsletter is informative about art happenings and shows!

Yes, I will be busy, and it has to be that way, making art and improving is a full time job!


Sunday, March 20, 2016

SPRING: A Time For Inspiration


These days I am doing fairly well with art motivation, I have a stack of finished works and an even larger stack of "in-progress" or "need some final touches" works. I have been working toward a goal of getting a work or two into a prestigious May/Sept Show but I am always looking for art inspiration.

You may have heard this before and I will say it again, go to your art museum! I always find inspiration at the museum.

These days my favorite work of art  at the museum is this beauty by Robert Henri - The Beach Hat. I love the expressive thick background and the simple strokes used to create the features and sweater. My favorite aspects of this painting are the brushstrokes. I continue to struggle with paint application and need to learn the deliberate placement (then leaving the paint/stroke alone). Look at the red stroke on her neck against the white of the shirt, look at the dark Alizarin paint stroke from the shoulder down to create form on the sweater - amazing! The colors are lovely and the model (Henri's wife) is gazing out at the viewer -a beautiful painting all around, I find it inspiring! Doesn't Henri make it all look so simple? What I would give to complete a portrait work like this!

My advice is to go to the museum and find a work that speaks to you. Then ask yourself why the work is interesting to you and how you can apply it toward your work. I love Robert Henri's backgrounds and think I will incorporate thicker multi-colored backgrounds with expressive strokes into my works, not copies just take-away inspirations and ideas! Instant Inspiration!


Thursday, February 25, 2016

The Art of the Selfie

Self Portrait Painting 

I took a selfie with my phone the other day and I was pleased with the photo (not pictured here). I pixelated the image in Photoscape and then created a small painting from the image.  I then took the painting to Art Critique where it was a colossal failure - there was not a positive word to be said about it, a disappointment to be sure. I strongly wanted self portrait advice other than "Use a mirror and paint yourself." These days, with photo selfies, I want more advice on painting the self portrait, there has to be a new normal! And if there is not, why not? What are the new art norms for Self Portraits? If there aren't any there should be - I do not want a self portrait of me with a frowny mouth (which is how I think many mirror self portraits turn out). Meh! So a new Journey begins...
My first "new" Self Portrait

 I have been thinking about creating self portrait for awhile. Would you believe there is not much online/searchable for self portrait artistry? I was hoping to find some self portrait ideas online. I didn't find much, but I did find one bit of inspiration at art critique. A fellow artist at Critique said, "I am gathering all my old paints and using them, that led to this painting." And that led to me gathering up my old paints (not in my current palette) and starting my self portrait journey.

My 2nd and 3rd self portrait
I laid out my "old" paints (not my usual palette), with lots of orange and purples and found an old photo and started working on a self portrait. In a few hours, I had a rather nice result. I kept putting out wild colors and kept mixing them to reasonable skin tone! Yes, you can get bright orange and punky purple to mix with whites, reds and yellows to get accurate skin tone. Some colors in this "old" paint palette included: Cadmium Orange, Manganese Purple, Indian Red and Sap Green - all colors that I have at home but don't take out each week for art! This was good in that I was fearless with paint application.

My 4th & most accurate self portrait
And, I painted the self portrait again And again ( using different photos; 5 Self Portraits thus far) each time trying new things. I did try to use a minty green - I wanted to create a wildly colored "Fun" portrait -- but I wiped it out as the minty green was too white and cool, it really  bothered me! Bright orange and pink, bring it, but that cool blue-green just did not speak to me - even though my intention was to be wild and against the grain!

Hey, I can mix accurate colors and skin tones - from some wild colors. I feel strong in this area!
You can surprise yourself, I love color but I am not wildly creative with color! In my mind I wanted a purple, red, orange wild self-portrait and yet when I laid out all those colors, I fell in love with Phthalo Turquoise! I proceeded to create an entire portrait painting Phthalo Turquoise & white--a Monotone Portrait painting! I pulled the extra colors off the palette and saved them for later.
My 5th and Phthalo Monotone

I am soliciting for self portrait ideas and links. Let me know where and if you see any modern Self Portrait articles and inspiration! Thank you!